



by Terry Allen
So far in this series, I've covered choosing & installing Webten & NetTen, running both applications on the same machine, as well as in our last installment, setting up your WebTen DNS & adding your first content to your server. as promised, this time, we're going to look at setting up ht://Dig, a powerful search tool built into WebTen 3.0.3 (I'm not sure about other versions) which can index sites on your server as well as sites you may want to index on other machines or on the Internet in general.
As with the last installment, you'll find the screenshot images referenced throughout the article in a table at the end, linked as you need to see them.
There were three important factors which really sold me on WebTen. The first was the fact that WebTen is basically an Apache server, with UNIX underpinnings, making for a nice stable server. The second was again UNIX related, that being the ability to use many different CGI scripts such as Perl, without the added system overhead of running an external Perl interpreter like MacPerl in addition to being able to use Apple & other CGIs & lastly, a search indexing tool which worked & was stable, which under Webten turned out to be ht://Dig, something I'd been wanting to install into my site for a long while.
Getting into the administration page for ht://Dig is very easy. As usual, let's assume you've already set up your DNS with a domain name such as 'yourdomain.com' & that there's an appropriate entry in your WebTen DNS for that domain name. We'll also assume that you have another computer to run a web browser on, to test out your work, that can access the server.
Open up your web browser. Netscape in this instance is a better bet than dealing with Internet Explorer, because of the way it deals with forms. In the location bar, enter 'yourdomain.com/index.cgi' (don't enter the ' marks) When you hit enter, you'll be presented with a login box, to which you should enter the login name & password you set up in your WebTen Administration password section.
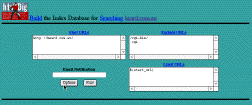
Now, WebTen will show you a screen, which has a couple of things. The most important of these is the 'Start URLs' box, which will already have the domain name you set up, entered into it. This s because ht://Dig assumes that this is the domain you want to set up a searchable index for. From here, you have one of three options. you can either click the 'Run' button, which will set ht://Dig off & do the index for you, or you can enter your email address into the email notification box & then hit 'Run', which will email you once the index is complete, or you can set up the options. for now, just click the 'Run' button.
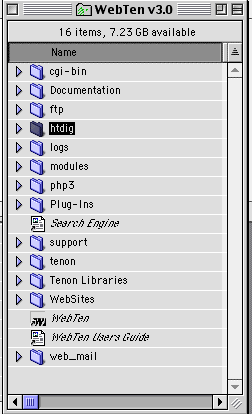
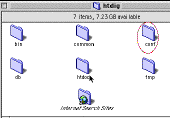
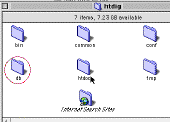
You'll notice it's a couple of seconds before WebTen sends the ht://Dig log screen back to you. During this period, ht://Dig is setting up a few files in the htdig directory within the WebTen folder. these include the yourdomain.conf file, plus some others in a yourdomain.com folder in an htdig subfolder called db If you watch inside these directories in the Finder, you'll see them being created.
The screen that comes back to you once these files are set up, tells you that your search has been initiated & gives a link to show where to look to see when its finished. If you're indexing a site on the server itself & it's not terribly large, it'll only take a couple of minutes to complete, so click on the link to see whether it's finished. If it isn't, wait a little longer & reload the page. when you see that the index is completed, you can now search your site, using a search box that's already been set up with the 'yourdomain.com' directory.
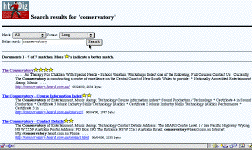
To get to it, type into your web browser, 'yourdomain.com/search/' You'll be presented with a plain vanilla ht://Dig search page, with a regular looking search box & a couple of menu options. Into the search box, enter something you are sure will return a positive search (like the word 'the' for instance). Hit the search button & in a flash, ht://Dig through WebTen will return a page with a list of hits if there was a positive find on your search, all nicely formatted with a relevance rating including a visual indicator of a number of stars if the relevance was high, or maybe just one if it was low. The results also show the date the page was last modified, which is great for users looking for date sensitive results.
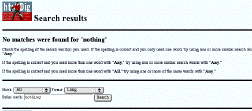
Now go back to the search page & enter something you're sure won't be found, like say an unusual country name or a fictitious animal like 'elephmouse'. Hit enter & you should be presented with a 'No Matches Found' page. Now that's all tested, that's it!. Seems a little too good to be true doesn't it, but really, that's all there is to setting up your first searchable index. Here comes an even easier bit, modifying the results pages to suit your needs.
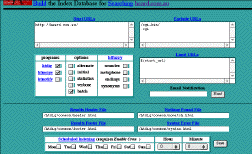
Once it's all tested, you need to go back into the ht://Dig cgi, so again you need to enter 'yourdomain.com/index.cgi' into your browser, enter the username & password to get to the first index page where you set ht://Dig running on your nominated site. At the bottom, next to the 'Run' button, you'll notice an 'Options' button, which you now need to click, which will then move into a much more detailed page, containing things you can set up to make the results pages look like part of your own site.
At the top of the options page, you'll notice that you've got a couple of boxes which are the same as the first page. It's the bottom half of the page which we're really interested in. There are 4 boxes which tell us the location of the header & footer parts of the results page & these are located inside the htdig folder within the WebTen folder. Once of these, the 'Syntax Error' is probably not of much use for you to change, unless your users are likely to enter results likely to cause an error to ht://Dig
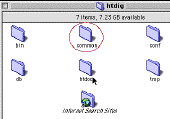
I always like to leave the standard things alone, adding my own bits in another location, so make a copy of the header.html, footer.html & nomatch.html files in a new folder, which you should call something associated with the name of the site you have index, like maybe 'ydsearch' (short for 'yourdomain.com') within the /htdig/common directory.
It's a bit outside the scope of this article to tell you how to edit HTML (hopefully if you are running your own web server, you already know some HTML), but basically, the header & footer files are what I would call 'half' HTML files. the ht://Dig script actually fills in the middle bit & uses these couple of files as the top & bottom of the results page that gets generated if a search is successful.
The nomatch.html file is easy enough to edit in your favourite HTML editor of in a text editor (even Simpletext will suffice) to make it look like a part of your site. From that nomatch file, you can grab the code that's the actual search form & copy it into a relevant page on your site.
Once you've made the modifications & they've been saved into the folder you just created (remember 'ydsearch'?), you need to enter the locations into the fields on the options page back in your web browser. In UNIX-speak, the locations are called paths, which simply means the location within the web server filesystem. Again following our example, the header field in the header option box on the page would be '/htdig/common/ydsearch/header.html'
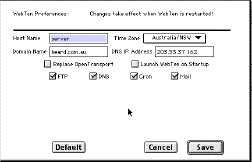
Likewise, the footer file would be at '/htdig/common/ydsearch/footer.html' & of course, the nomatch file would be at '/htdig/common/ydsearch/nomatch.html' Probably the last option you need to enter is when you'd like ht://Dig to update your index. This is right at the bottom of the option page & you must have enabled the CRON selection in WebTen's preferences window. If you haven't done this already, go & do it now, then restart WebTen. Select the appropriate index time in the 'Scheduled Indexing' field at the bottom of the options page. Lastly, click the 'Save' button, which will save all the options & you can go & try out your new customised searchable website - good work.
As Tenon's support people & those on the WebTen mailing list will attest, I've had a couple of small problems, one of which was that I couldn't get ht://Dig to update my original index, because the index had somehow become corrupted. To cure it, there are a number of files you need to delete. These are again located in the htdig folder in your WebTen directory. One of these is the .conf file, in the conf folder & will be named something like 'yourdomain.conf' & the other is the 'yourdomain.com' folder & the files that are in it. You will also need to delete the appropriate db folder, which is labelled inside the htdig db folder You can simply drag these to the Trash from within the Finder, so it's easily done. Once you've removed the files, just go through the motions of setting up the search index from scratch again & away you go again. This seems to be a fairly isolated problem (just my luck ;), so you may never come across it.
So there you have it - an easy to use search indexer built into your web server, with a pretty simple to set up options page. You've also learnt the barest essentials about UNIX paths, so next time, we'll delve into setting up a CGI application - the WWWBoard script. In the meantime, if you want to see ht://Dig in action, visit www.tenon.com & do a search or see the search indexer I set up at heard.com.au
 |
 |
 |
 |
 |
 |
 |
 |
 |
 |
 |
 |
 |
 |