
|
|
|

Running NetCloak With iTools 7.x
Previous versions of NetCloak for OS X used Apple's redirect-acgi Apache module, which was supplied only with Apple's server OS. That module is not present in Mac OS X Server 10.3. The current NetClo ak uses FastCGI to interface to Apache2, which makes NetCloak operation available to users of Apple's non-server OS. Note that, previously, NetCloak was a standalone product. The current version is distributed only as part of the iAssist package and its use will require a valid iAssist license to validate NetCloak. The NetCloak application installed by iAssist is called NetCloakEnabler.
Installation is simple but does require that you install and run iAssist in order to extract both NetCloakEnabler and Maxum's version of the FastCGI Apache module.
Note: as of when this article is being written, the version of NetCloakEnabler available does not run as a daemon; it is a Carbon application with a GUI (Graphical User Interface). In order to run it at the login screen, a conventional StartupItem can be used to start NetCloakEnabler when the server Mac is started. If, however, a user logs in and then logs out, any carbon applications that were running will be quit. In order to restart NetCloakEnable r in this circumstance, iAssist includes a daemon to monitor applications, including Unix apps, and restart them if they quit. See Running NetCloak later in this article. Maxum intends to have a daemon version of NetCloakEnabler in the future but it is not available in this initial release of iAssist.
Installing NetCloak and the FastCGI Module
Install Tenon's iTools 7.x normally. Test to see that everything works.
Now, install iAssist. Mount the iAssist disk image and copy both iAssist and the iAServerDaemon Installer to your Applic ations folder. Run the IAServerDaemon installer (on the server). When prompted, enter your administrative password to enable the installation. Reboot the server.
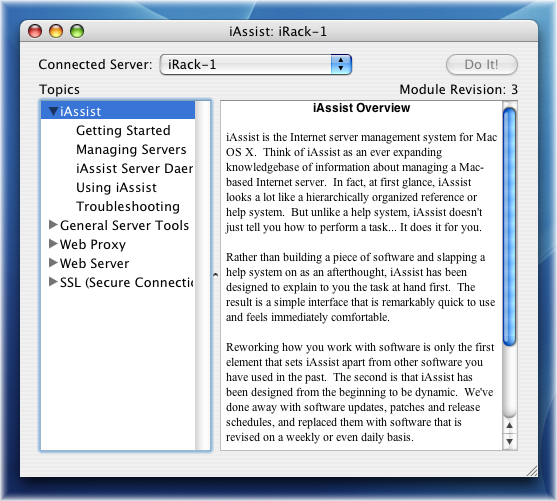
Now run iAssist to connect to the server. iAssist itself can be run right on the local server, or you may run the iAssist client on any OS X workstation to connect to your server remotely. The first t ime iAssist is run, it will connect to the iAssist Updates server at Maxum.com to download the various components that make up iAssist. Depending on your Internet connection speed, this might take a while.
When the initial iAssist update is done, you will see a series of 'article' titles in the left pane of its window. As you click on an article topic on the left, the article will appear on the right. S ome articles have sub-articles that can be exposed by clicking its triangle, thus revealing the list of sub-articles. For any article, you can also press Command-D to Display the selected article in a separate window. While following the below instruction s, you may want to have the official Maxum instructions displayed in a separate window.
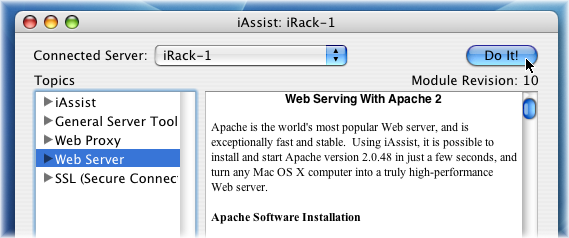
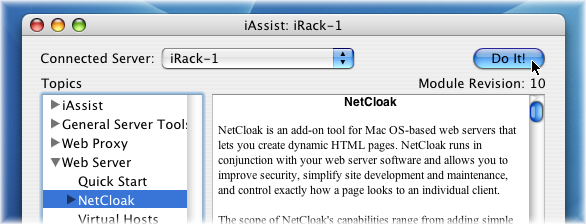
Choose the Web Server article and click the Do It! button.
This brings up the Apache controller. Under the Installation category, click the 'Install Apache' button.
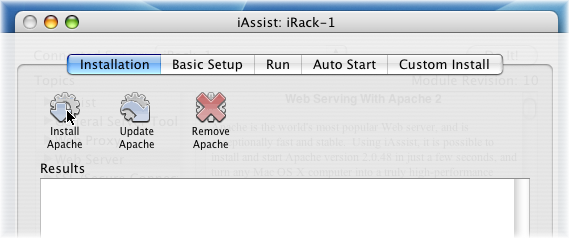
This installs Apache2 in /usr/local/Apache2. The installation includes the Maxum FastCGI Apache module. (Don't worry about any conflict with iTools' Apache; the iAssist Apache won't be there for long. We only install Apache to get the FastCGI module, then we'll remove it) iAssist will report on the installation progress in the Results window.
When the Apache installation is complete, click the Done button on the Apache controller.
Expand the triangle for the Web Server article (left pane) and click on the NetCloak sub-article. Click Do It!
In the NetCloak controller, under the Installation category, click the 'Install NetCloak' button.
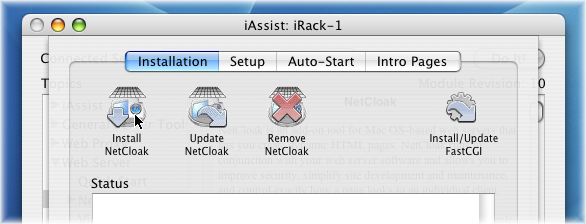
This installs NetCloakEnabler in /Users/Shared/NetCloak. Note: It does not matter where
It is not necessary to use the 'Install/Update FastCGI' button. The module was installed into the iAssist Apache 2 Modules folder when Apache was install ed. If Maxum releases a later version of the module, use the 'Install/Update FastCGI' button to install it over the older version.
Now copy the Maxum FastCGI module from the iAssist Apache modules folder to the iTools Apache 2 modules folder.
In Terminal, type:
cp /usr/local/Apache2/modules/mod_fastcgi.so /Library/Tenon/WebServer/Modules/mod_fastcgi.so
If necessary, use chown and chmod to make sure that mod_fastcgi.so has the same ownership and permissions as other modules in /Library/Tenon/WebServer/Modules.
We now have what we need from the iAssist Apache installation, so it can now be deleted. As you did earlier, select the Web Server article in iAssist and click the Do It! button.
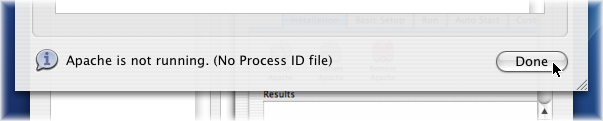
Click the 'Remove Apache' button. This deletes the entire /usr/local/Apache2 directory.
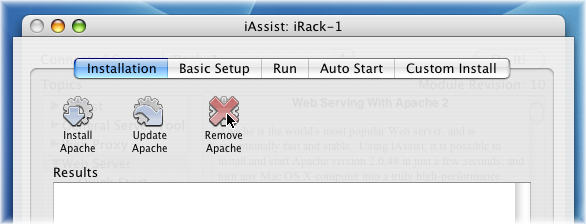
Click the Done button to dismiss the Apache controller.
Copy the following lines ...
#
##################
# File Name: fastcgi-NetCloak.conf
# FastCGI/NetCloak Configuration
# This file must be 'Include'ed into /Library/Tenon/WebServer/Configuration/httpd.conf
#
# Load the FastCGI module
LoadModule fastcgi_module /Library/Tenon/WebServer/Modules/mod_fastcgi.so
#
# Tell Apache to send all requests with specified suffixes to FastCGI
AddHandler fastcgi-script .nclk .fdml
#
# Tell FastCGI to send all URLs in the Web server folder to NetCloak
FastCgiExternalServer /Library/Tenon/WebServer/WebSites -host localhost:9008 -pass-header Authorization
#
# Tell Apache to allow CGI access in the specified directory
<Directory /Library/Tenon/WebServer/WebSites>
Options FollowSymLinks ExecCGI
</Directory>
#
# End FastCGI/NetCloak Configuration
##################
#
Use the copied lines to create a text file at /Users/Shared/NetCloak/fastcgi-NetCloak.conf (in the same directory as NetCloakEnabler). Then add the following line to the iTools httpd.conf file at /Library/Tenon/WebServer/Configuration/httpd.conf.
Include /Users/Shared/NetCloak/fastcgi-NetCloak.conf
It is suggested that the 'Include' line above be placed at the bottom of the httpd.conf file.
In the example above, only '.nclk' pages will be "cloaked." If you wish to have NetCloak process '.html' and '.htm' pages as well, add ".html .htm" after ".nclk .fdml" in the "AddHandler..." line above.
Running NetCloak
NetCloakEnabler must run as 'root'. Since carbon apps run with the permissions of whatever user starts them, you must not start NetCloakEnabler by double-clicking (especially the first time it is laun ched.) Instead we will employ the iAssistServerDaemon to start and monitor NetCloak, restarting it if necessary, such as when a user logs out.
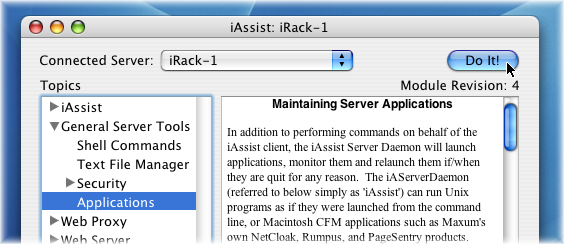
In iAssist, click on the'General Server Tools' article, then on the 'Applications' sub-article. Click the Do It! button.
In the 'Monitoring' category, enter reasonable values for Polling Interval and Retest Tries. In the example below, iAssist will check every 10 seconds to see if applications it monitors are running. If, on 3 successive checks, it finds that an application it monitors, in this case, NetCloak, is not running, it will initiate a restart.
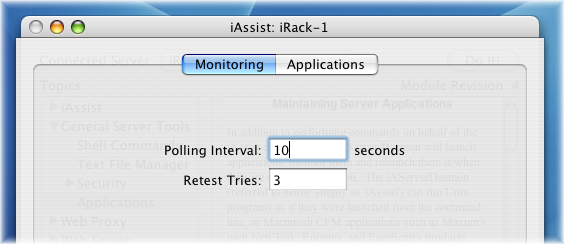
Next, click the 'Applications' category and configure it as shown below. If you have moved NetCloakEnabler from its default location, be sure to enter the actua l path. When it is entered correctly, press 'Add/Update' then 'Save Changes To Server'. NetCloakEnabler should then start shortly, depending on the polling interval and retry values you entered. Click Done.

See the iAssist NetCloak article for instructions on configuring NetCloak's options and preferences and for validating NetCloak with your iAssist license data.
Here's a simple page to see if NetCloak is working for you.
<html>
<title>NetCloak Test Page</title>
<body bgcolor=#ffffff>
<center><h2>NetCloak is <hide>NOT<show> working!</h2></center>
<p>
<b>Server Statistics -</b>
<dl>
<dd>
Current Date: <insert_date><br>
Current Time: <insert_time><br>
NetCloak Version: <insert_netcloak version><br>
Running Since: <insert_netcloak upsince><br>
Pages Processed: <insert_netcloak hits><br>
Test Page Accesses: <insert_count nc32testpage><br>
</dl>
<b>Request Statistics -</b>
<dl>
<dd>
Requested Host: <insert_host><br>
Requested URL: <insert_thisurl><br>
Client Address: <insert_domain><br>
Client Browser: <insert_client><br>
HTTP Header:<br>
<dl><dd>
<pre><insert_header></pre>
</dl>
</dl>
Copy and paste into a new html document and call it from your Apache server.
Contributed by: Warren Michelsen (January 2004)
| Tenon Home | Products | Order | Contact Us | About Tenon | Register | Tech Support | Resources | Press Room | Mailing Lists |

|
Copyright©2013 Tenon Intersystems, 232 Anacapa Street, Suite 2A, Santa Barbara,
CA 93101. All rights reserved. |