NetTen Menus
The NetTen menus provide a means of accessing frequently used administration items. The Post.Office menu contains an interface for manipulating logs, importing accounts, and setting the postmaster and license. The Name Server menu allows setting access to NetTen's built-in DNS server.
Post.Office Menu
The "Post.Office" menu contains items for monitoring and managing the Post.Office log files, dynamic display of NetTen statistics, entering a NetTen license number, and controlling access to the Postmaster account. Typically, the license number and access options are specified once when NetTen is installed, and change very infrequently after that.
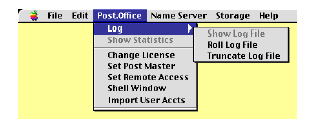
Show, Roll, and Truncate the Post.Office Log
Post.Office maintains a log file of its start-up and shutdown times and other unusual circumstances. This log file may be opened for viewing. The log file is shown as default when NetTen is started.
To open the log file, select the Show Log item under the Post.Office Log menu. The Post.Office Show Log window appears as shown below.
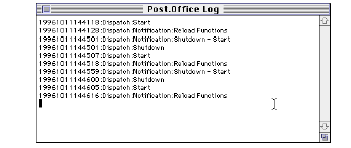
Post.Office Log Window
The long sequence of numbers before each log entry is a date stamp for that entry. The string represents this sequence: YearMonthDayHourMinuteSeconds. The string 19990812144118, for example, would represent the date: August 12 1999 02:41:18.
Each entry in the Post.Office log causes the log file to grow larger. The log file is stored in the logs folder in your NetTen folder. Unregulated growth of this file will not aversely affect your NetTen system, but it can be an inconvenience to read. To assist log maintenance, NetTen has built-in functions to roll and truncate the log file. Rolling the log file means that the log file is copied to the backups folder in the tenon folder and an empty log file is put into its place. Truncating the log file simply clears the log file without copying anything.
The Post.Office Truncate Log window appears as shown below. If the Post.Office Log window, shown below, was open while the log is truncated, it must be closed and reopened to display the newly truncated log.
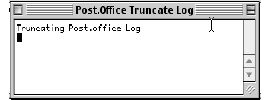
Truncating the Post.Office Log
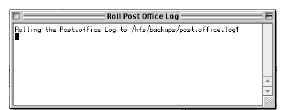
To Roll the Post.Office log, choose "Roll Log File" form the log side-menu in the Post.Office menu. You will see the rolling status window. When that window is gone the rolling is complete and the rolled log file will be in the "backups" folder in your NetTen folder.
Post.Office Statistics Window
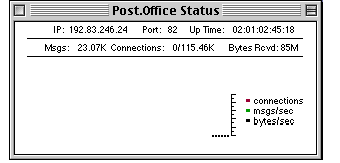
Various statistics concerning the state of the NetTen administration web server may be displayed on the local console. The Statistics item of the Post.Office menu will display the following window which may be terminated by clicking the window close box.
"IP: "and "Port:" display what IP address and port the NetTen administration server is running on. "Up Time:" is a count updated every second of how long your NetTen system has been running. "Msgs:" is a count of how many messages NetTen has sent and received, "Connections:" is how many connections are active over the total number of connections since NetTen was started, and "BytesRcvd:" is the total number of bytes of data NetTen has received.
Entering a License Number
A NetTen license number must be entered to permanently use NetTen. NetTen license information is contained with the documents your receive when NetTen is purchased. Without a NetTen license number, NetTen operates with a trial period which lasts 14 days or until a license number is entered.
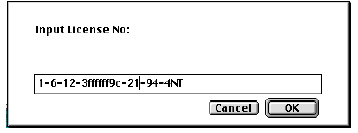
To input a new license number, select the "Change License" item under the Post.Office menu. The Post.Office License window appears as shown below. Typically new license numbers are cut and pasted into the new license field, but be careful because our license numbers are case sensitive.
Setting the Postmaster Password
When NetTen is initially installed, Post.Office contains a single Postmaster account. This account may be used to add or delete other accounts within Post.Office, as well as to send and receive e-mail from the postmaster@your.domain address. Until an initial password is specified, the Postmaster account is locked and configuring or using Post.Office is not possible.
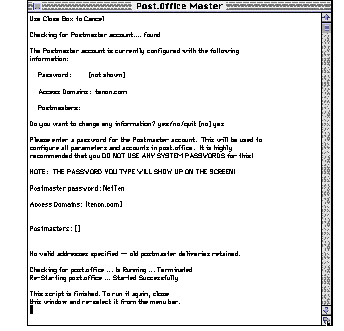
To create or change the Postmaster password, select the Postmaster item under the Post.Office menu. Answer " yes" to the " Do you want to change any information?" question and you will be prompted for a password.
Once the password is entered, you can respond to the remaining questions without making any other changes simply by hitting the <return> key. By default, Postmaster access is enabled only for the Postmaster account and is restricted to the current domain. When it is necessary to add other names to the Postmaster list or to enable Postmaster access from other domains, this window can be reopened and those configuration changes can be made at that time.
The Postmaster password may only be specified or changed using NetTen Password menu, it may not be changed via the web or e-mail interface to Post.Office.
Enabling Postmaster Remote Configuration
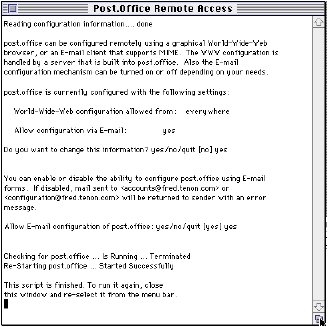
Post.Office may optionally be setup to permit configuration changes via an e-mail interface. Select the Set Remote Access item under the Post.Office menu. The Post.Office Remote Access window appears as shown. If you have just installed NetTen, Remote Access settings permit web configurations from everywhere and configuration via e-mail is also enabled. To disable the configuration via e-mail option, answer "yes" to the "Do you want to change any information?" question and you will be prompted for a "yes" or "no" answer to the "Allow e-mail configuration of Post.Office:" question.
When a menu item is used to expose a window to make changes in the Postmaster configuration, Post.Office is automatically restarted. This restart is reported in the bottom portion of the window, as shown below.
Shell Window
Selecting "Shell Window" reveals a command line interface to NetTen's underlying, albeit invisible, UNIX layer. This interface is used in special circumstances where changes need to be made to settings that are easily accessed through the shell. NetTen users are not advised to use the shell and NetTen administrators should not usethe shell, unless advised to do so by Tenon Technical Support.
Importing User Accounts
The Import User Accts item of the Post.Office menu provides for automatically folding a list of mail server accounts into NetTen. Using this feature, you could, for example, import users from another mail server application.
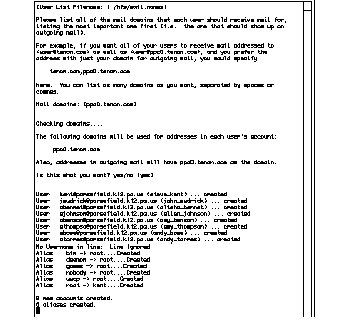
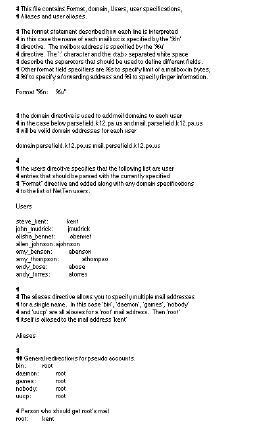
Click on the Import User Accts menu item and you will be prompted for the name of a file with a list of users to be added. By prepending /hfs to the filename, files in the NetTen folder will be searched. A file named "NewUsers" stored in the NetTen directory would be referenced as "/hfs/NewUsers" directory. NetTen supports a variable format for the specification of users. The file contains directives specifying the format of each user entry. The following example file (next page) shows how to use these directives. The "Format" directive specifies the syntax for the import file. Below are all the possible fields to specify and import in this file.
mailbox field |
directive |
|---|---|
Name Server Menu
The Name Server menu contains an items for entering a DNS Administrators username and password. This name and password must be entered in a dialog box presented by a web browser before accessing the DNS Administration Server. Typically, the usernames and passwords are specified once when NetTen is installed, and change very infrequently after that.

Setting the DNS Administrator Password
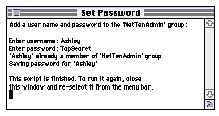
A DNS Administrators password must be entered after installing NetTen. To add an administrators name and password, select Set Password from the Name Server menu in the NetTen program. The Set Password window will appear.
DNS Administrators Set Password Window
Typically, this user is the same person that administrates Post.Office, but this does not have to be the case. In this example, the administrators name is Ashley and the password is TopSecret. Note that the name and password are case sensitive.
Multiple users can be assigned passwords for DNS administration, simply run the Set Password script once for each user. To change the password for an existing user, run the script and re-enter the existing users name, then enter the new password.
